Ticketing System
Overview
The ticketing system is the heart of Ticksify. It's a place where your customers can create tickets to ask for help or report a problem. And it's also a place where you can manage your tickets and help your customers to solve their problems.
The ticketing system is a great way to build a relationship with your customers and to make them feel that you care about them. And that's what we all want, right? :)
Before your customers can create tickets, you need to create a product and a category for your tickets. Even if you're having only one product or category, you still need to add them in, and we can hide it from your customers later.
Setting up the Product
The first thing that you need to do is to create a product. A product is a service or a product that you offer to your customers. For example, if you are a web hosting company, you can create a product for each of your hosting plans. Or if you are a software company, you can create a product for each of your software products.

To create a product, go to the admin panel and look under the "Resources" section and you will find a link to the Product management. From there, you will see a list of products or a message if there are no products yet, of course. Now click on the "Create Product" button to create a new product.
There are not much information that you need to fill up to create a product. The only required information is the name, provider and an unique identifier for your product. If you are offering a service or selling product on your own website, you can choose "Self Hosted" as the product provider. And if you are selling on a marketplace like Envato, you can choose "Envato" as the product provider.

Ticksify also helps you to import your products from Envato. To do that, you need set up your Envato Personal Token first. Then you can import your products from Envato by clicking on the "Import from Envato" button. After that a modal will show up with a list of your products on Envato. Select the products that you want to import and click on the " Add" button to import them to Ticksify.

If you are using the Envato Integration feature do not edit the product identifier. As it's used to validate the purchase code of the product.
Setting up the Category
The next thing that you need to do is to create a category. A category like a department in a company. It's a place where you can group your tickets. For example, we can have a category for Bug Report, Feature Request, or Pre-sales question, and so on.
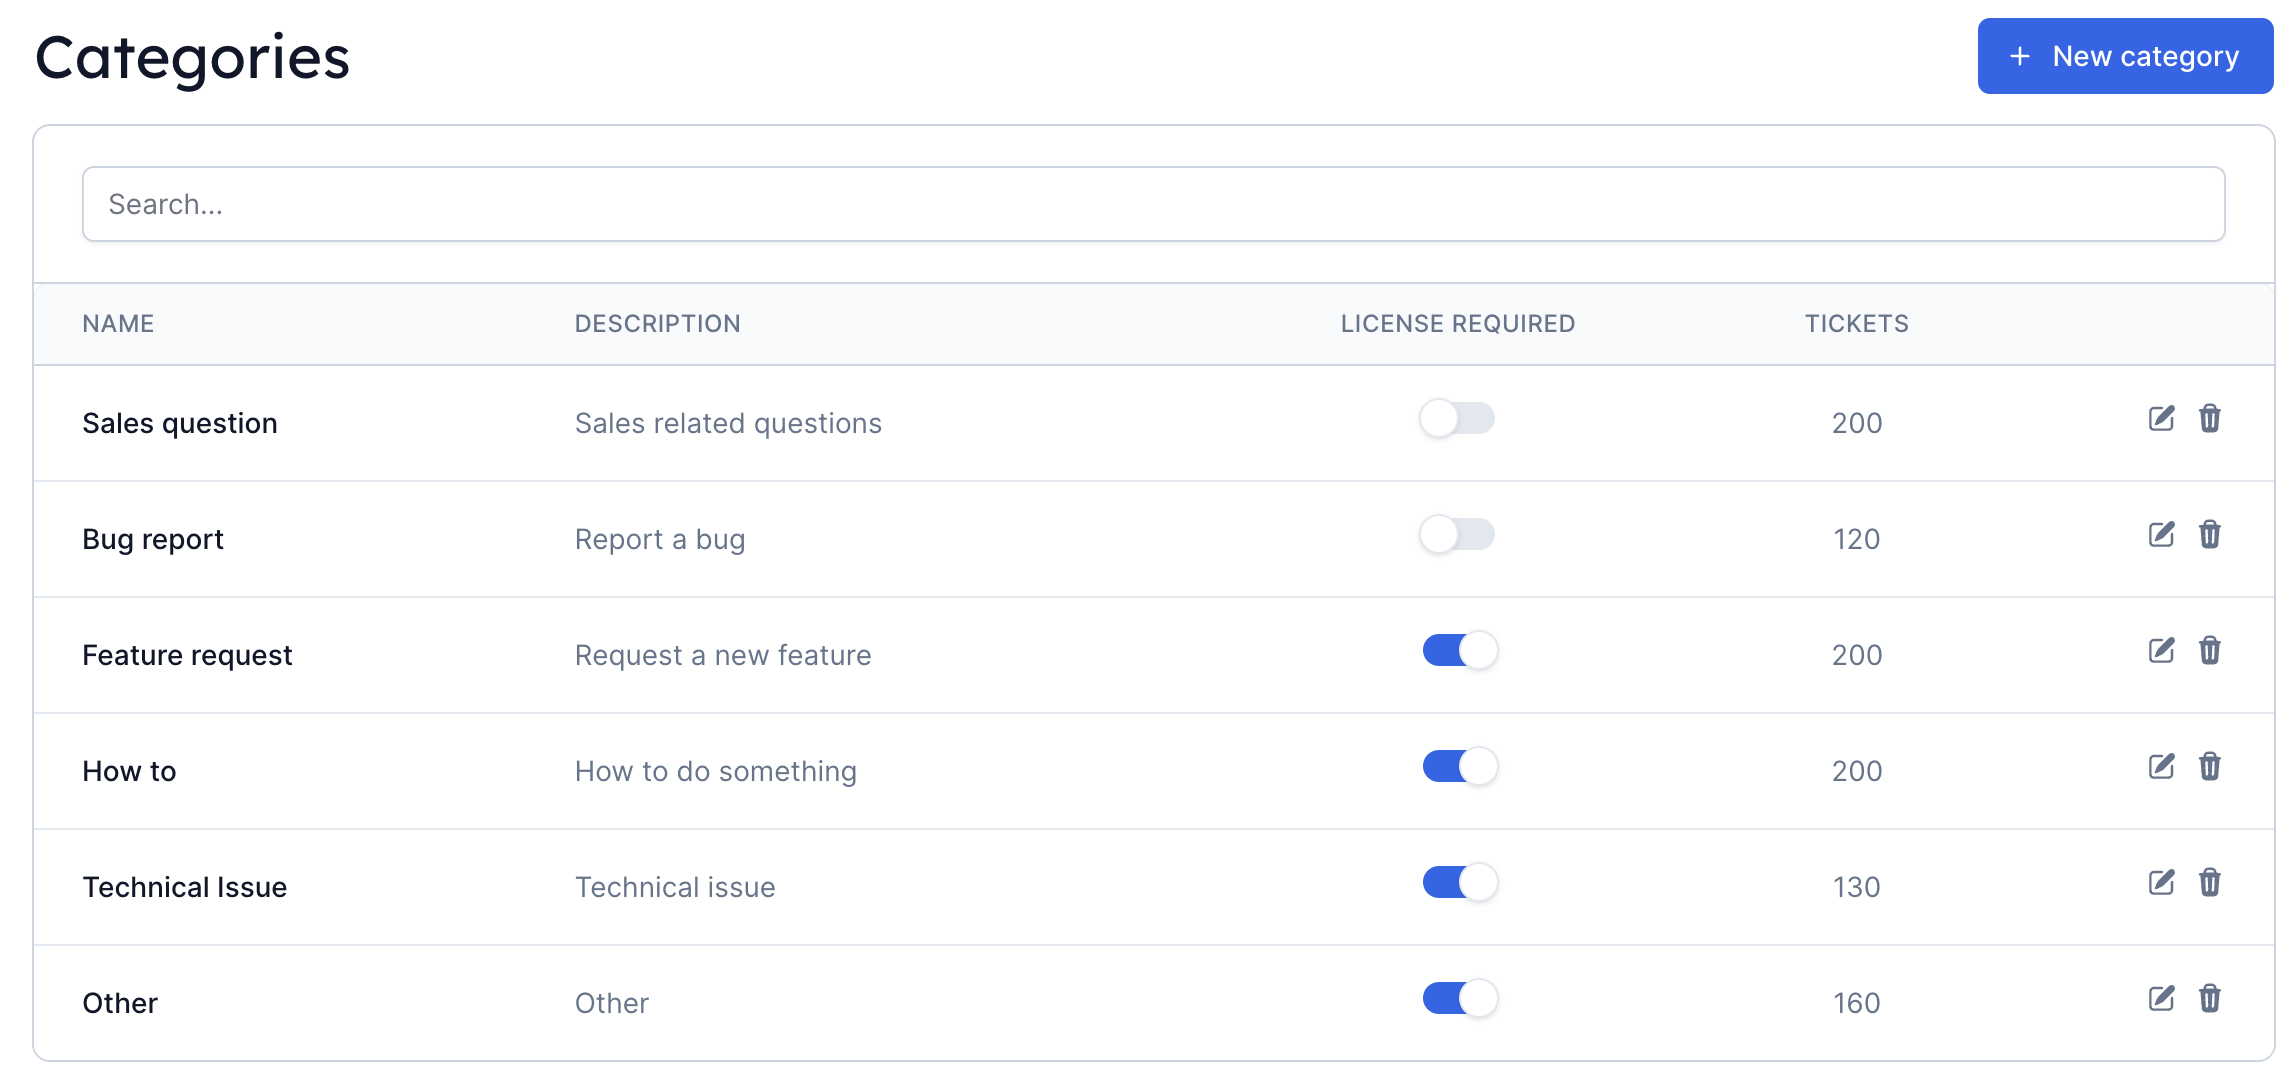
Just like the product creation, there are not much information you need to fill up to create a category. It's just the name and the description. If you want to require a license for the category while customer submitting a ticket, you can use the "Require a License" toggle which is available after the category is successfully created.
And that how you create a category. Cool, right? 😎
Ticket management
Creating a ticket
Now that the necessary setup is done, we can start accepting ticket from our customers. To create a ticket, your customers need to go to their ticket management page and click on the "Submit a Ticket" button. Then they will be redirected to the ticket creation page where they can fill up the form with the ticket details.
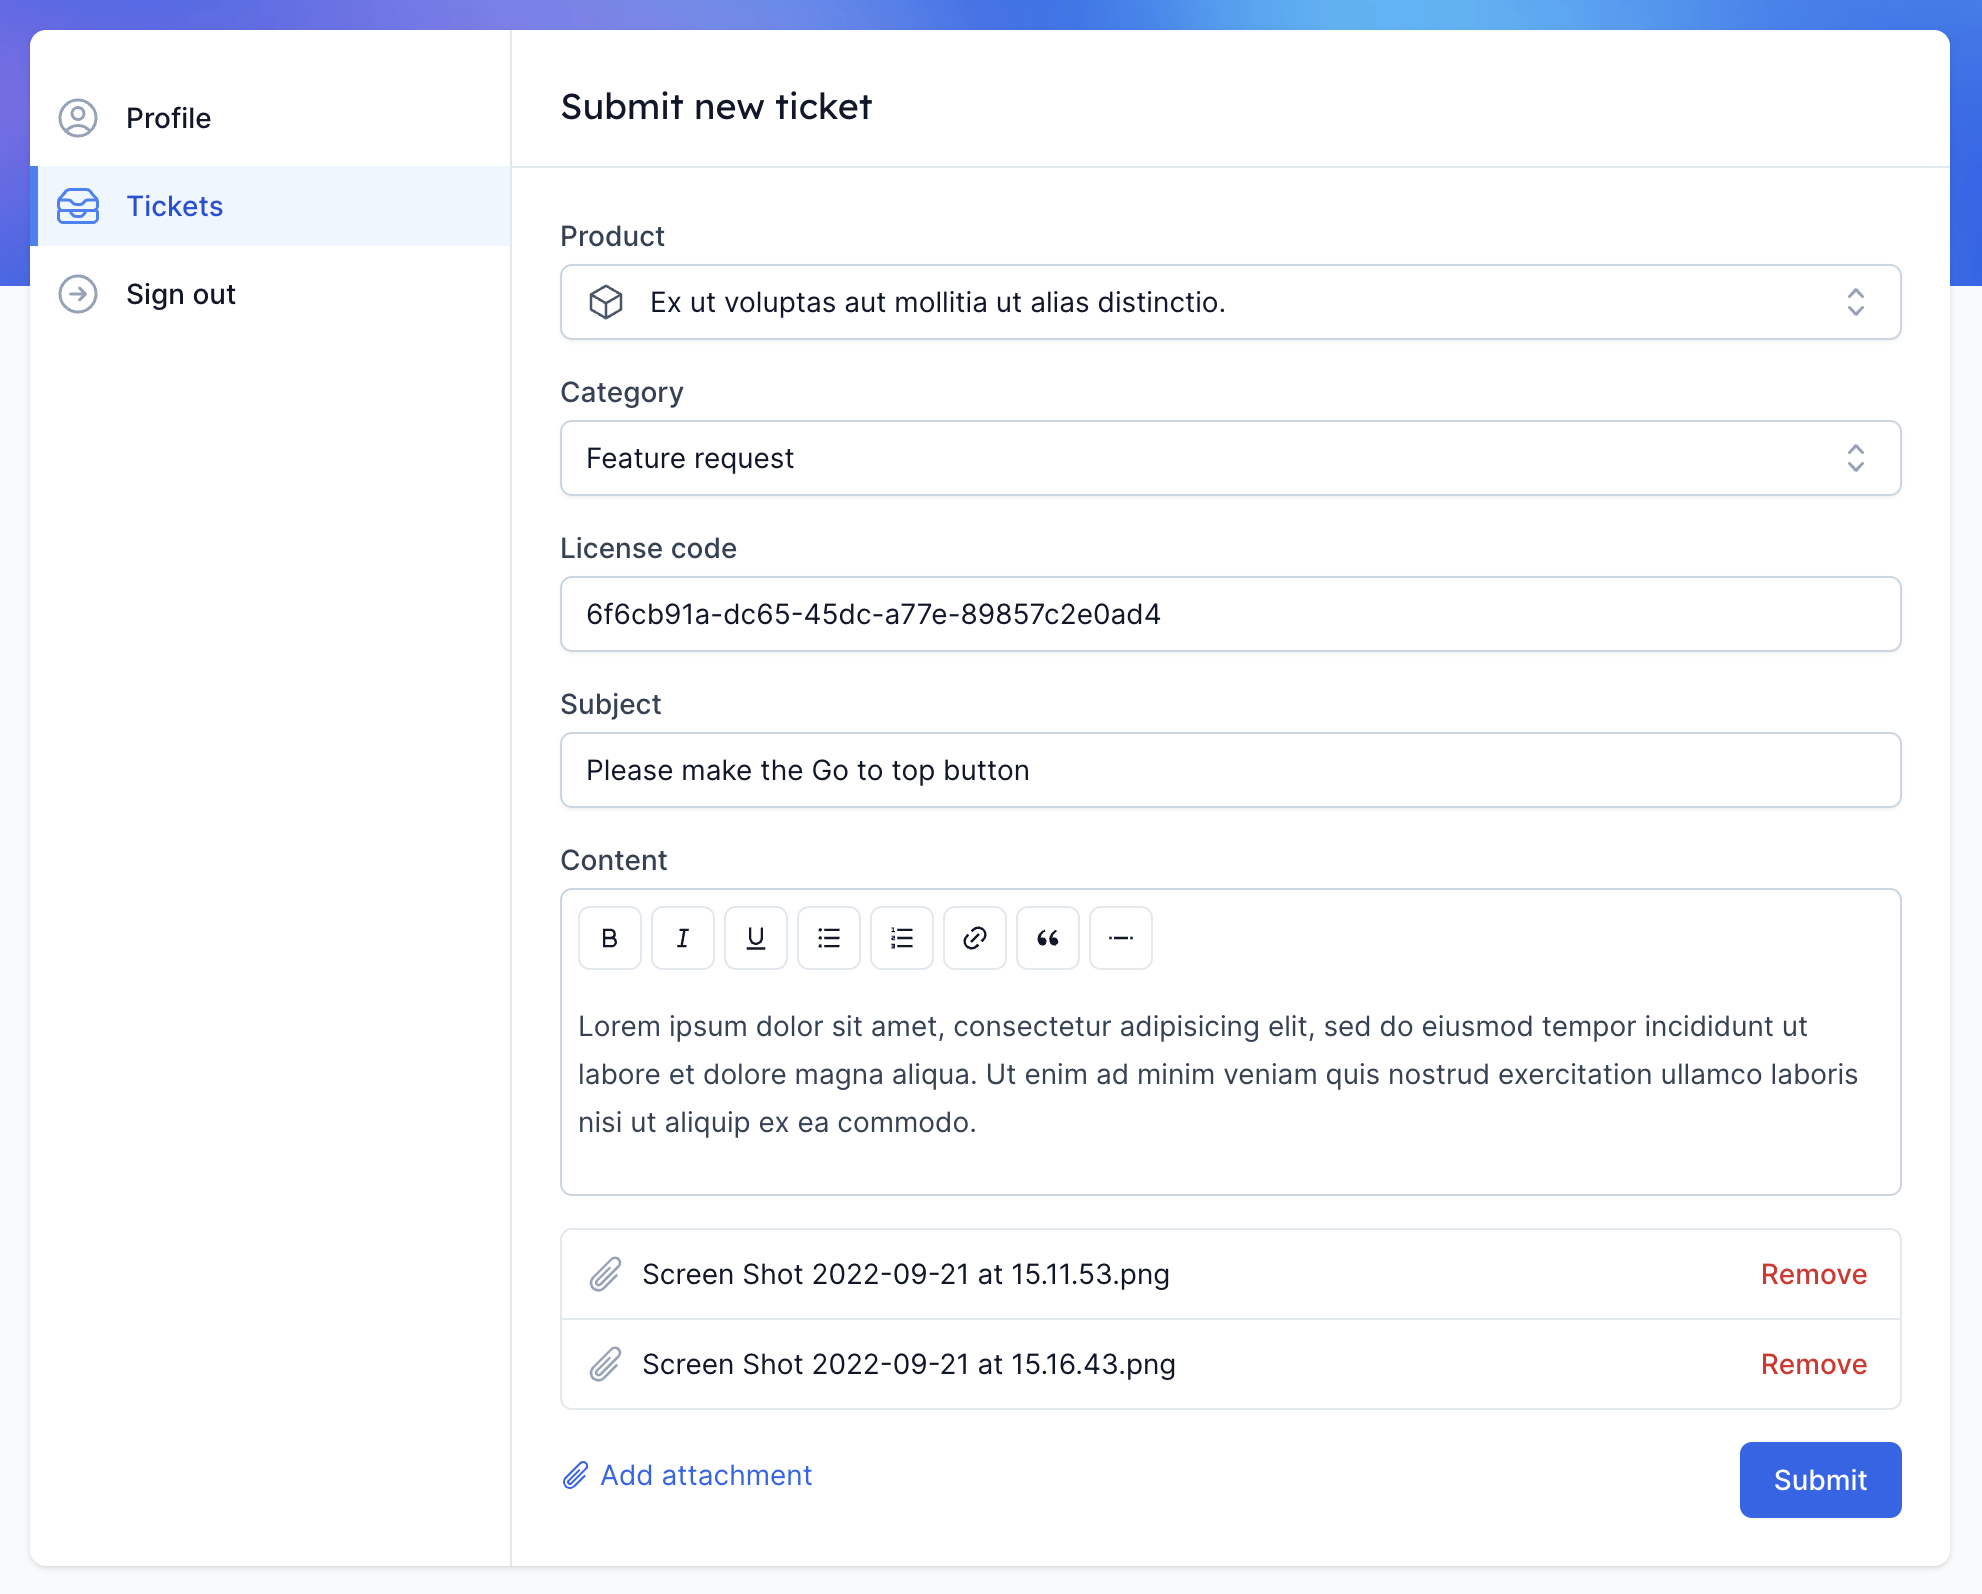
The ticket creation form is divided into two parts. The first part is the ticket details and the second part is the ticket message. The ticket details are the information about the ticket itself, such as the subject, the category, and the product. The ticket message is the message that the customer wants to send to you.
Ticket status
After the customer submits the ticket, it's status will be "Open". This means that the ticket is waiting for a response from you. And if you respond to the ticket, the ticket status will be changed to "Pending". This means that the ticket is waiting for a response from the customer.
And we also have some other ticket status such as:
- On hold tickets are cases that can’t be finished in a given moment. For example, you need to consult someone from another department. In this case, you can choose the “On hold” status to make sure you will reply as soon as you have the solution.
- Solved tickets are cases that are finished and the customer is satisfied with the solution. In this case, you can choose the “Solved” status to make sure you will not reply to the ticket again.
- Closed tickets are cases that are finished. You can close a ticket if you have solved the problem or if you have decided that the ticket is not valid.
To change the ticket status, click on the ticket status dropdown and select the status that you want to change to.
Ticket priority
The ticket priority is a way to tell your customers how important the ticket is. You can choose between four different ticket priority: Low, Normal, High and Critical. The ticket priority is useful when you have a lot of tickets to handle. You can use the ticket priority to prioritize the tickets that you need to handle first.
To change the ticket priority, click on the ticket priority dropdown and select the priority that you want to change to.
Ticket labels
The ticket labels are a way to categorize your tickets. You can use the ticket labels to categorize your tickets by the type of the ticket, the department, or the product. Unlike the ticket category, you can use multiple labels for a ticket.
To assign a label to a ticket, click on the ticket labels dropdown and select the labels that you want to assign to the ticket. You can also create a new label by clicking on the "Create a new label" link if the label you want to assign is not available.
Ticket assignee
The ticket assignee is a way to assign a ticket to a specific agent. If you have multiple agents, you can assign a ticket to an agent so that the agent can handle the ticket. If you don't have multiple agents, you can leave the ticket assignee empty. In this case, you will need to use the Admin account to handle the ticket.
Unlike the Admin account which can see everything, the agent account can only handle the tickets that are assigned to them. So if you want to use the agent account to handle the tickets, you need to assign the tickets to the agent first.
To assign a ticket to an agent, click on the ticket assignee dropdown and select the agent that you want to assign to the ticket.
Responding to a ticket
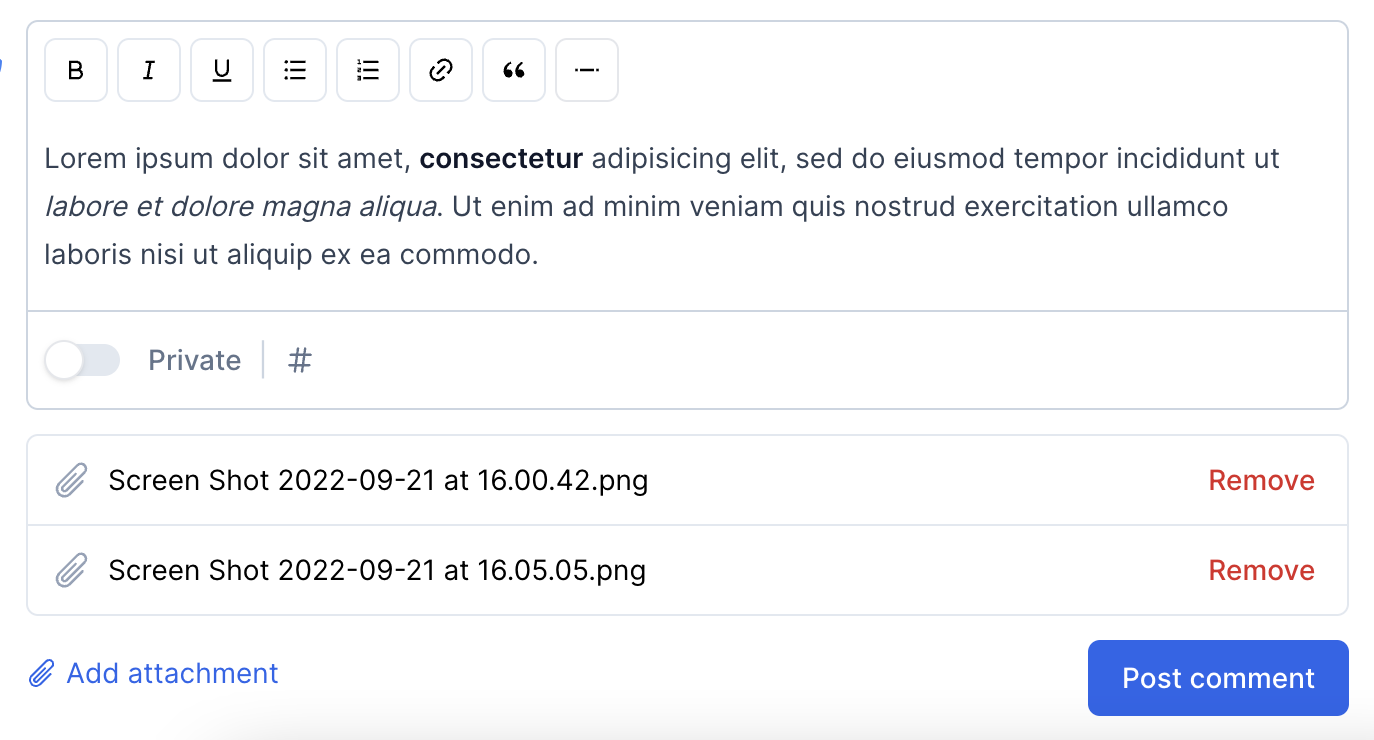
After the customer submits the ticket, you can start responding. Ticksify uses a minimized version of the article WYSIWYG editor to create the ticket response editor. You can use it to format the text, add links, and so on.
Attachments
You may also add attachments to the ticket response. To do that, click on the "Add attachment" button and select the file that you want to attach to the ticket editor window.
Currently, Ticksify supports the following file types: .jpg, .jpeg, .png, .bmp, .gif, .svg, .webp, .pdf, .zip. And the maximum file size is 5MB.
Private note
If you want to add a private note to the ticket, you can use the "Private" toggle button. The private note is a note that you can use to keep track of the ticket. It will not be visible to the customer.
Canned responses
And you can also insert a canned response to the ticket response. To do that, click on the "Insert canned response" button and select the canned response that you want to insert to the ticket response.